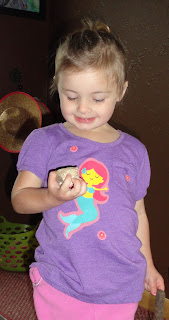
 |
| The finished new shirt, a size 5T! |
 |
| The back of the new shirt. |
 |
| This original shirt was a size 24 months. (Here the images are already cut out.) |
-old or too small/too big shirt or other cool fabric
-HeatnBond Iron-on Adhesive Ultrahold (the Ultrahold is no-sew, so you don't need to reinforce the pieces by sewing)
-scissors
-iron and ironing board/iron safe surface
-extra piece of cotton fabric, optional
Process:
1. Turn the old shirt inside out and iron on a piece of the HeatnBond large enough to cover the entire back of the image (bumpy side against the shirt, the bumps are the adhesive).
2. Turn the old shirt right side out and cut out the image as you want it.
 |
| The original shirt images cut out (and my roll of HeatnBond) and you can see the HeatnBond on the back of the images. |
 |
| Cut out images on top of new shirt, deciding where to put them. |
5. Iron the pieces into place where you want them on the new shirt.
6. Turn the shirt inside out and iron the back of the images to make sure that the adhesive has completely adhered to the new shirt.
7. Turn the shirt right side out and enjoy!
 |
| Enjoy the new shirt and it fits! |


No comments:
Post a Comment
I love hearing what you have to say; let me know what you think. I look forward to comments and will reply to your comments or questions! Thanks for checking out my blog; come back to visit soon!