Tuesday, November 26, 2013

Sour Cream Pumpkin Cheesecake

This is a re-post; I just wanted to remind you of the AWESOME, perfect for Thanksgiving dessert! 
... I'm making it for Thanksgiving at my parent's house again this year! 

This is a fantastic holiday dessert!  It needs to be made ahead and travels well; so try it for your next family get together!

I liked the idea of the unique sour cream topping; I thought it would be a twist on a basic pumpkin cheesecake...it was great!

I made it for Thanksgiving at my sister's house and it was said "its better than pumpkin pie for Thanksgiving"!  We have decided it is definitely a keeper!  And it takes a little time but its really pretty easy to make!

I found the recipe from Taste of Home.
Ingredients for Crust:
-1 1/2 cups graham cracker crumbs {single bag of crackers from box = 1 1/2 cups}
-1/4 cup sugar
-1/3 cup butter, melted

Ingredients for Filling:
-3 (8 oz. each) cream cheese, softened
-1 cup brown sugar
-15 oz. can pumpkin
-5 oz. evaporated milk
-2 tbsp corn starch
-2 eggs
-1 1/4 tsp ground nutmeg {I realized while making this that I only had about 1/4 tsp nutmeg left; so I used used 1/4 tsp nutmeg, 1/2 tsp ground ginger plus 1/2 tsp mace... it worked out great!}

Ingredients for Topping:
-2 cups (16 oz.) sour cream
-1/3 cup sugar
-1 tsp vanilla extract
-additional cinnamon, optional

Tip for making graham cracker crumbs:
1.Coarsely crunch crackers in the bag they are packaged in.
2. Pour the coarse crumbs into a gallon sized ziplock bag, seal bag only about 3/4 way across {to let some of the air out}.
3. Roll over crumbs with rolling pin. {Just don't roll them out of the opening on the top.}
Process:
1. Preheat oven to 350 degrees.
2. Combine cracker crumbs and sugar in a small bowl.
3. Add melted butter.
4. Stir to coat crumbs evenly.
5. Lightly grease/spray a 9 inch {10 inch} spring-form pan; I think next time {and there will be a next time!} I'll do it in a 10 inch spring-form, because the 9 inch got VERY full!
6. Pour the crumbs into the bottom of prepared pan.
7. Press crumbs into the bottom and about 1 1/2 inch up the sides of pan.
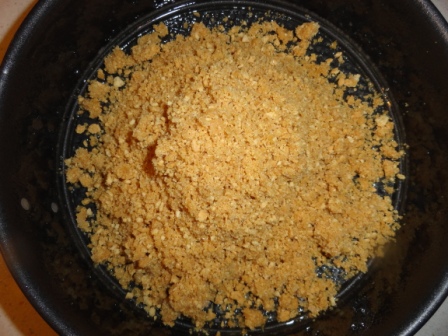
8. Bake crust for 5-7 minutes until lightly golden.
9. Meanwhile make filling.
10. Beat cream cheese and brown sugar until smooth.
11. Add pumpkin.
12. Add evaporated milk, cornstarch, cinnamon and nutmeg (or nutmeg, ginger and mace).
13. Beat until smooth.
14. Beat in eggs.
15. Pour filling into baked crust.
16. Place spring-form pan on a baking sheet and bake for 60-80 minutes, until almost set in the center.
17. When filling is almost finished, combine the topping ingredients.
18. Beat well until smooth.
19. Remove cheesecake from oven. {I think mine cracked because I opened the oven to take the steamy picture above and let out all of the steam; oh well it still looked great and tasted fantastic!}
20. Pour the sour cream mixture over the baked filling, spread out evenly. {You can see its extremely full!}
21. Carefully, return to 350 degree oven and bake for an additional 5-10 minutes.
22. Remove from oven.
23. Carefully move the spring-form pan to a wire rack, and cool 10 minutes.
24. After cooling for 10 minutes, carefully run a knife around the edge of pan to loosen.  Let cool 1 hour longer.
25. Chill in refrigerator overnight. {Mine was chilled for about 24 hours before serving; and it traveled really well in the spring-form pan.}
26. Remove the sides of the pan and let cheesecake stand at room temperature for 30 minutes before slicing.
27. I also moved the cheesecake to a serving dish; just so it looks nice!  It actually moved from the spring-form base to the serving dish fairly easy with a large spatula.
 28. Sprinkle the top of the cheesecake with cinnamon.
 29. Carefully cut into wedges and enjoy!
Print Friendly and PDF

Wednesday, November 20, 2013

Sunshine Award!

Last month, I was so honored to be nominated for the Sunshine Award.  The blogger who selected me was http://urbanoveralls.net.  

I would like to say a HUGE THANK YOU TO URBAN OVERALLS!  I feel so fortunate to be recognized as a "blogger", since I still feel very new to the title and I am still learning so much.

First the Sunshine Award:
Sunshine Award
The rules of this award are the following:
1. Use the logo above in the post.
2. Link to whoever nominated you.
3. Write ten pieces of information about yourself.
4. Nominate ten fellow bloggers "who positively and creatively inspire others in the blogosphere".
5. Leave a comment on the nominees' blogs to tell them of the award.

Ten pieces of information about myself:  
{Things you probably didn't know about me!}
1. I love art, have always loved art and find so much joy in creating and viewing art!  I am a certified Art Teacher.
2. I am new to raising chickens (started about a year and a half ago), although I have ALWAYS wanted free-range chickens to enjoy in my yard.  I find so much pleasure in being a chicken "farmer"; I love spending time with them, holding them and knowing that they know I'm always going to be there for them.
3. I truly enjoy cooking new recipes {if you follow my blog you'll quickly notice the frequency of recipe posts} and trying new grocery items, like an odd fruit or a strange squash from the farmer's market.
4. I find pleasure in making grocery and home products that most people buy in a store; like homemade seasonings, yogurt, baking mixes, ketchup, soap, etc.
5. I come from a family that was started as dairy farmers, although I have spent most of my life living away from the farming life.  Now, I'm getting back to it in my own little way.
6. I really like reading books, the real thing, with paper pages!
7. I really enjoy essential oils and fresh herbs, there is nothing like either one of them!
8. I love my garden although I don't always enjoy doing the tough work; but the rewards I get for the work make every drip of blood, sweat and maybe tears worth it!
9. I once ran over a toad in the road with my  car, turned around to check to see if I did and cried about it.  But now I have developed the strength to "take care of" skunks, raccoons and possums in order to protect my chickens.
10. I love making useful items. I think this is the main reason I enjoy being a vendor at the local farmer's market so much; I can make and sell handmade functional items! 

I now nominate 10 awesome fellow bloggers:
1. 1840 Farm:  Jennifer creates beautiful sewn baskets (I love mine!) and other awesome kits and things, has a great garden and some fantastic farm animals!
2. The Iowa Housewife: Myrna and Sue are fellow Iowans, they share some really great recipes and some beautiful images from places in Iowa!
3. Canning Homemade!:  As a gardener I have found many valuable canning recipes and canning tips from Canning Homemade; allowing me to preserve the treasures from our garden and enjoy them year round.
4. chicken scratch poultry: I find chicken scratch poultry to be a fantastic source for chicken raising information along with tons of "I want to try it" recipes!
5. From Which Things Grow: Cares and Mimi are a mother, daughter duo; who share fantastic seasonal recipes, along with some great photos!
6. I Am Momma Hear Me Roar: Cheri does some great refashioning and art/craft/decor projects!  She shares awesome images and tutorials!
7. Punk Projects: Katie shares some super cool projects; paper, jewelry, sewing, recycling/repurposing, great tutorials. Very inspirational!
8. The (mis) Adventures of a "Born Again" Farm Girl: Mandie is a fellow chicken farmer, who shares great recipes, chicken raising stories, gardening and crafting ideas.  She also farms mealworms and makes real maple syrup!
9. vixenMade: Victoria shares tons of awesome tutorials and printables that are great for handmade gifts for anyone and everyone you love!
10. Paisley & Polka Dot Threads: Catherine is a fantastic furniture refurnisher; she shares her great furniture before and afters.  I find her creations to be very inspirational!

* I really hope all I nominated can accept this, if not, please accept the complement expressed in the nomination.  If you can't accept, I understand totally but please pass on to someone you admire.

Print Friendly and PDF

Seed Savers Exchange... 50% off sale!

Hello all,  I just wanted to get the word out that Seed Savers Exchange has some of their 2013 seeds 50% off!  There are only 5 days left!  I just ordered my seeds for starting in the Spring; I am already looking forward to it!  

Yes, you can order now for next season's planting {and save yourself some moola!}; just make sure when you receive your seeds you store them in a cool, dark place.  I keep mine in the original envelopes in an airtight container or plastic bag.  


This past season, I planted seeds from 1998 and had plenty of winter squashes and pumpkins to prove that if the seeds are stored correctly you can use them for years!

I like to order from Seed Savers Exchange because you can get so many fruit, vegetable and ornamental varieties that are not offered in the store or from other vendors; just because of what they do to prevent rare plants from becoming extinct and preserve heirloom varieties for everyone to enjoy for years to come.

Seed Savers Exchange also offers information for the home and market gardener about seed planting and preserving.  Enjoy!

"Our mission is to conserve and promote America's culturally diverse but endangered garden and food crop heritage for future generations by collecting, growing, and sharing heirloom seeds and plants."

No, I'm not a Seed Saver member, but I think what they do is admirable and I absolutely love the seeds and services they provide!  


Now, go get your seed stock for next year {only 5 days to go}!


Print Friendly and PDF

Tuesday, November 19, 2013

Crockpot Cheeseburger Chili

This chili is great!  Its easy and has tons of flavor.  There are also many ways you can alter this recipe to make it your own.  Enjoy!

Ingredients:
-1 lb. ground meat {I have used turkey and beef, although last time I used a bacon pork sausage; all are great!}
-16 oz. bag frozen corn {you could also use a can of hominy or 15 oz. can black or kidney beans}
-1 onion, finely diced
-14 oz. tomato sauce or spaghetti sauce
-7 oz. can fire roasted diced tomatoes {or 1 cup diced fresh tomatoes with a sprinkle of liquid smoke; found near bbq sauce in the grocery store, I find its usually on the top shelf}
-1 packet of chili seasoning {I use 1/4 cup Homemade Chili Seasoning}
-1/4 cup ketchup
-2 tbsp prepared yellow mustard {or Dijon}
-2 tbsp brown sugar
I used 1 pint crushed tomatoes, plus a sprinkle liquid smoke
and 1 pint green tomato pasta sauce from
our garden in place for the tomato sauce and fire roasted tomatoes.
Optional Toppings:
-shredded cheese
-sour cream or plain greek yogurt
-diced fresh tomatoes
-thinly sliced green onion or other diced onion
-thin sliced fresh jalapeno
-real bacon pieces
-diced pickle

Process:
1. Brown meat.
2. Place onion and meat into the bottom of crockpot.
3. Add tomato/spaghetti sauce and tomatoes.  Mix well.
4. Add ketchup, mustard and brown sugar.
5. Add chili powder and mix well.  
6. Stir in the frozen corn, hominy or bean.  Cook chili on low for 8-10 hours or on high for 4-5 hours.
 7. Enjoy with your toppings of choice!

Print Friendly and PDF

Monday, November 18, 2013

Homemade Chili Seasoning

This is the best Chili Seasoning I have ever tasted!  Love it!  And its VERY easy and inexpensive to make!

I also like that this recipe doesn't have any salt in it and yet is so tasty and almost smoky in flavor!  Enjoy!

Tomorrow, I'll post my family's favorite Cheeseburger Chili Recipe where I use this awesome mix!

Ingredients:
-1/4 cup chili powder
-2 tbsp garlic powder
-4 1/2 tsp onion powder
-2 tbsp oregano
-1 tbsp paprika
-2 tbsp cumin
-1 1/2 tsp thyme

Process:
1. Combine all ingredients, mix well.  
1/4 cup = 1 packet of seasoning mix
2. Store in an airtight container {I used an empty clean bouillion jar}.
* I also wrote the recipe on a wide piece of painter's tape and placed that on the jar so that I never have to search for the recipe.

Print Friendly and PDF
Related Posts Plugin for WordPress, Blogger...