Monday, November 26, 2012

Sour Cream Pumpkin Cheesecake

This is a fantastic holiday dessert!  It needs to be made ahead and travels well; so try it for your next family get together!

I liked the idea of the unique sour cream topping; I thought it would be a twist on a basic pumpkin cheesecake...it was great!

I made it for Thanksgiving at my sister's house and it was said "its better than pumpkin pie for Thanksgiving"!  We have decided it is definitely a keeper!  And it takes a little time but its really pretty easy to make!

I found the recipe from Taste of Home.
Ingredients for Crust:
-1 1/2 cups graham cracker crumbs {single bag of crackers from box = 1 1/2 cups}
-1/4 cup sugar
-1/3 cup butter, melted

Ingredients for Filling:
-3 (8 oz. each) cream cheese, softened
-1 cup brown sugar
-15 oz. can pumpkin
-5 oz. evaporated milk
-2 tbsp corn starch
-2 eggs
-1 1/4 tsp ground nutmeg {I realized while making this that I only had about 1/4 tsp nutmeg left; so I used used 1/4 tsp nutmeg, 1/2 tsp ground ginger plus 1/2 tsp mace... it worked out great!}

Ingredients for Topping:
-2 cups (16 oz.) sour cream
-1/3 cup sugar
-1 tsp vanilla extract
-additional cinnamon, optional

Tip for making graham cracker crumbs:
1.Coarsely crunch crackers in the bag they are packaged in.
2. Pour the coarse crumbs into a gallon sized ziplock bag, seal bag only about 3/4 way across {to let some of the air out}.
3. Roll over crumbs with rolling pin. {Just don't roll them out of the opening on the top.}
Process:
1. Preheat oven to 350 degrees.
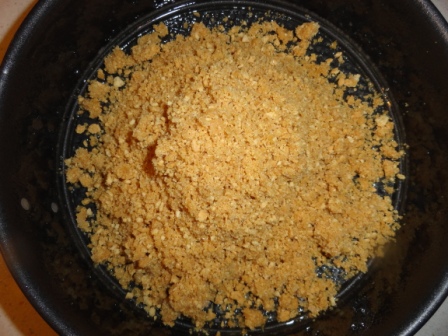
2. Combine cracker crumbs and sugar in a small bowl.
3. Add melted butter.
4. Stir to coat crumbs evenly.
5. Lightly grease/spray a 9 inch {10 inch} spring-form pan; I think next time {and there will be a next time!} I'll do it in a 10 inch spring-form, because the 9 inch got VERY full!
6. Pour the crumbs into the bottom of prepared pan.
7. Press crumbs into the bottom and about 1 1/2 inch up the sides of pan.
8. Bake crust for 5-7 minutes until lightly golden.
9. Meanwhile make filling.
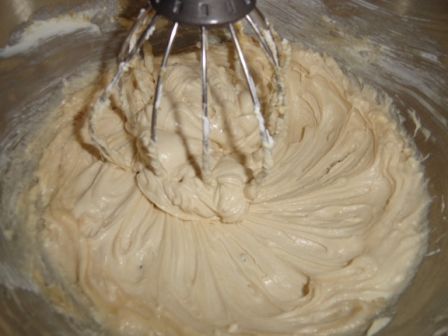
10. Beat cream cheese and brown sugar until smooth.
11. Add pumpkin.
12. Add evaporated milk, cornstarch, cinnamon and nutmeg (or nutmeg, ginger and mace).
13. Beat until smooth.
14. Beat in eggs.
15. Pour filling into baked crust.
16. Place spring-form pan on a baking sheet and bake for 60-80 minutes, until almost set in the center.
17. When filling is almost finished, combine the topping ingredients.
18. Beat well until smooth.
19. Remove cheesecake from oven. {I think mine cracked because I opened the oven to take the steamy picture above and let out all of the steam; oh well it still looked great and tasted fantastic!}
20. Pour the sour cream mixture over the baked filling, spread out evenly. {You can see its extremely full!}
21. Carefully, return to 350 degree oven and bake for an additional 5-10 minutes.
22. Remove from oven.
23. Carefully move the spring-form pan to a wire rack, and cool 10 minutes.
24. After cooling for 10 minutes, carefully run a knife around the edge of pan to loosen.  Let cool 1 hour longer.
25. Chill in refrigerator overnight. {Mine was chilled for about 24 hours before serving; and it traveled really well in the spring-form pan.}
26. Remove the sides of the pan and let cheesecake stand at room temperature for 30 minutes before slicing.
27. I also moved the cheesecake to a serving dish; just so it looks nice!  It actually moved from the spring-form base to the serving dish fairly easy with a large spatula.
 28. Sprinkle the top of the cheesecake with cinnamon.
 29. Carefully cut into wedges and enjoy!
Print Friendly and PDF

Sunday, November 25, 2012

Baby Doll Diapers & Wipes Set

This is a really fun and easy project; this would be a fantastic handmade gift for the little one in your life.  Christmas is coming :D

I made 7 diapers, wipes and the baby powder container in one day with lots of time to spare.

You can glue or sew the Velcro on; I glued because at the time my sewing machine was on the fritz! But it worked out great!  My daughter has been using these for over a year now and their still in great shape and the glued on Velcro has held {which was my major concern}.

I found this awesome idea from Happy Together; she has a printable template you can use or you can make your own.  Enjoy!
Materials:
-felt {1 for each diaper, 1 per 2 wipes}
-fabric scissors
-sewing pins
-diaper shaped template {make your own or get a printable one from Happy Together}
-coordinating Velcro
-fabric glue or sewing machine with thread {I used Beacon Adhesives Fabri-Tac, Permanent Adhesive}

Other Optional Materials:
-empty small wipes container
-small clear container with screw on lid {I got mine at Hobby Lobby}
-glitter glue
-permanent marker
-stronger glue
Process for Diapers:
1. Pin template to felt piece, carefully cut out around template.
2. Cut a piece of Velcro {I used the soft side} about 4 inches long for the front of the diaper {you could cut two smaller pieces but I did one long strip so that the diapers will even close around the smallest "babies"}.
3. Glue/sew the Velcro to the front of the diaper. {TIP: fold it up like your putting it on the "baby" to be sure your gluing it in the correct place.}
4. Cut two smaller pieces, about 1 1/4 inches, of the scratchier side of Velcro and glue/sew them to the sides that will wrap around the "baby" and stick to the front piece of Velcro.
5. Allow glue to dry completely and enjoy with your little ones.

Process for Wipes:
For the wipes all you need to do is cut the pieces of felt to the size you want; I cut them in half and just folded them to fit into the old wipes container I was going to store them in.

Process for Baby Powder:
1. Fill clear container about 1/4 way with glitter glue, roll the container around to coat the sides {you could leave the lid off and let the glue dry; I didn't, I think the one I made over a year ago is still liquid}.
2. Use the permanent glue to glue the lid on so your little one can't get it off {or you'll have glitter glue all over}.
3. Use the permanent marker to put small dots on the lid of the baby powder {for the "holes"}.
4. Enjoy!
Print Friendly and PDF

Saturday, November 24, 2012

Garlic Cheddar Biscuits {like Red Lobster's}

These are really good!  And very easy!  I use my Homemade Baking Mix.

I don't know where I originally found this recipe, but I've been making it for a long time and its definitely a keeper!


Ingredients for Biscuits:
-2 1/2 cups baking mix
-3/4 cup milk
-4 tbsp (1/2 stick) butter, softened or melted
-1/4 tsp garlic powder
-about 1 cup shredded cheddar or other cheese {in the pictures below I used Parmesan, it was very good!}


Ingredients to Brush on Top:
-2 tbsp butter, melted
-1/4 tsp dried parsley
-1/2 tsp garlic powder
-pinch of salt

Process:
1. Preheat oven to 400 degrees.
2. Mix all biscuit ingredients.
3. Drop biscuit mix onto a lined or greased baking sheet {about 1/4 cup each}.
4. Bake biscuits for 15 to 17 minutes, until they begin to turn golden around the edges.
5. Melt together all of the topping ingredients; you can do this on the stove-top or in the microwave.
6. Remove biscuits from oven and immediately brush with seasoned butter.
7. Serve immediately. Enjoy!

Print Friendly and PDF

Thursday, November 22, 2012

French Garlic Bread with Homemade Garlic Butter

This is really great and it tastes better than the prepared loaves you can buy in the store.

I use this Garlic Butter recipe.

Ingredients:
-garlic butter, softened
-loaf of French bread {I like to make my own: Crusty French Bread}

Process:
1. Cut the loaf lengthwise, but no all of the way through.
2. Spread the desired amount of garlic butter on the inside top and inside bottom of loaf.
3. Close loaf and place on a large piece of aluminum foil.
4. I folded the sides of the foil in to the center and pinched closed.
5. Then pinch both sides of the foil closed.
6. Bake loaf directly on the oven rack at 350 degrees for 20-30 minutes.
7. Remove from oven, open foil.
This is what the inside looks like after baking.
8. Use a cutting board and bread knife to evenly slice the loaf.
9. Return the sliced loaf to the foil and serve right out of the foil {then you don't have to dirty any more dishes! ;D}.
10. Enjoy!

Print Friendly and PDF
Related Posts Plugin for WordPress, Blogger...