
Alright, so we bought our house just over a year ago.
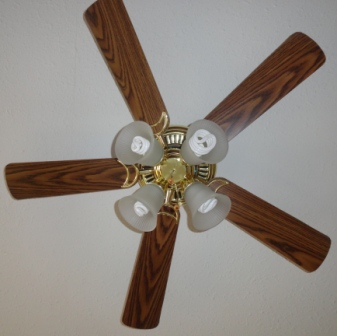
I absolutely love our place, but the previous owners installed "gold" colored fan/lights in the kitchen. Our kitchen is large and has two ceiling fans/lights in it and they both are what I think is "tacky" gold and "icky" fake-looking wood fan blades.

I wanted to change them somehow, but I didn't want to spend the money to buy new fans!
So, I came up with the idea of painting the existing fans/lights to customize them to our tastes.
After giving my husband some reassurance that this would work and it would look good, and at the very least it would look better than they did before!
We ended up leaving the fan blades, since when we took them down and cleaned them up we saw that the reverse sides were the color of cherry wood, which was actually the exact color of paint we had bought.
This is how we did it...
Materials:
-old/current fan/light fixture
-spray paint primer {we used a gray primer for metal, and this way you don't have to sand the shiny surface to "rough" it up}
-spray paint for the "gold" parts
-spray paint for the blades, optional
-painters tape, for masking
-super glue, optional
-coordinating paint marker, optional
-degreaser, optional {I needed this since the fans were in the kitchen, the blades were greasy to touch and this made cleaning them up a breeze!}
Note: I used less than 1 can of primer for 2 fans and 1 full can of Hammered Black per fan (2 total).
I used Simple Green Degreaser like this, I bought a gallon from Amazon and use it all around the house; its biodegradable and not harsh on your skin...
1. Remove the fan/light from the ceiling mounting bracket. {This is really the only part that my husband did; I can wire a light bulb, but I just trust him more to do this!}
3. Wash any parts that are dusty or greasy; you want it to be clean and grease-free for painting! {Anything that doesn't have wires can be washed in your dishwasher on the top rack if you want.}


4. Mask any areas where you don't want spray paint.
I made an "X" of painters tape over the light bulb holes and put a piece of tape over the pull string.

To mask the motor parts and all the wires I just placed a clean plastic container over the parts so they wouldn't get paint on them; this worked really great and was a quick and super easy way to mask these parts!

I used a coffee can on the bottom and plastic container on the top of the motor part; this also gave me a great base to prevent the pieces from having to be turned or tipping over while I was painting them.


5. Now your ready to paint; spray all of the pieces with primer. You don't need to get both sides of the pieces that hold the fan blades, you won't see the other side.

Allow the primer to dry completely. {I didn't bother painting any of the screws.}


8. Meanwhile... since we decided to keep the fan blades the "cherry" wood color I didn't have to paint them. But I still didn't like the edges of the fan blades {they were a pale-pasty tan color}; so I knew they needed to be painted, but I found the idea of trying to paint them with a brush, tedious!
So... I decided to rubber band them together and then I used a black paint marker to color the edges. Let it dry, then move the rubber bands up or down and color where the rubber bands were.


It actually worked great and looked great!


Since I had taken the fabric piece off to wash it I had to find a way to get it to stay in its place again?!
So after some thought, I decided to use a little super glue; applied to the metal ring part around where the inside and outside edge of the fabric would lay.
You just have to hold it in place a little while the glue sets; you will get a little glue on your fingers, that seeps through the fabric.


Remove any masking tape.


Its like we got brand new fans for the price of a couple of cans of spray paint! Yay!

Thank you for documenting and sharing the step-by-step process of renovating your ceiling fan with us! You see, I have done this many times before since we have a lot of ceiling fans at home, but when my friends would ask me to teach them how I do it, I just couldn't. I don't think I have the skill to explain and teach other people how I do stuff, so I really find your post a great relief. When my friends ask me again, I would send them to your blog. Thank you! Staci Severns
ReplyDeleteGreat !!! This is so phenomenal!!!That is very impressive! Ceiling Fans are gorgeous and the makeover is totally amazing. I love it. You really did a super job with Ceiling Fan! I use to do buy online Ceiling Fan as its time saving.
ReplyDeleteAbsolutely brilliant Idea of changing the design of ceiling fans which can enhance the look and feel of your room. Thanks for sharing this brilliant post with everyone.
ReplyDelete