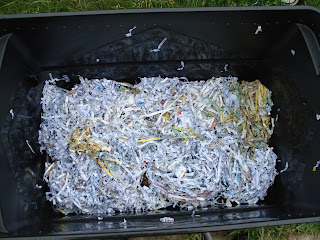
This project is so simple and the time you put into it is so worth it!
Sorry, I didn't take pictures of the way it is assembled; if you have questions please ask!
I ordered the red worms online from Worms Etc; they came in a little cotton pouch and were ready to go! I paid $21 for a pound but I see the price has come down since then. There is just something so cool to get worms delivered to your house!
When we made our last move I passed this one on to a friend for her family to enjoy!
I think I just may have to make another one for us; the worms speed up the composting process and naturally multiply.
I used to keep mine outside during the warm weather and brought it in to the basement in the winter so that I could continue using it and the composting process could continue all year. You could also store it inside the garage and depending on where you live you could probably use it year-round.
If you store your worm bin outside be sure to place it in a cool, shaded place.
You can "feed" the worms your junk mail (just not the shiny paper or envelopes with plastic windows), all of you fruit and veggie scraps, eggs shells, coffee grounds, used tea bags, leaves/twigs from your yard/garden, cardboard (just remove the plastic tape), even used kleenex (I know it sounds gross, but you can). I've also heard you can compost cotton or other natural fibered clothing; I've never tried it.
If you are composting bigger things like melon rinds, pumpkins, sticks/twigs they will take longer to breakdown. One thing you can do to speed up the process is cut or break them into smaller pieces.
Don't worry about the smell; there is next to no smell as long as you only add fruit, vegetable and paper scraps {NO ANIMAL PRODUCTS, NO BREAD OR OTHER SCRAPS THAT HAVE ANIMAL PRODUCTS IN THEM.}
Here's what you need:
-2 totes with covers {both the same size; consider the amount of fruit and veggie scraps you accumulate to decide the size you need}
-drill
-drill bits (one about 1/4 inch and the very small just to let air in; use what you have)
-4 small bricks, blocks or tiny flower pots (something sturdy that will hold up to some weight)
-about 1 lb. red worms
-soil/dirt {just a scoop from outside will be fine, sandiness is good; the worms need the grit to digest their food}
-shredded paper {only use newspaper, printer paper and junk mail that has NO PLASTIC, NO SHINY PAPERS LIKE MAGAZINES}
-water
-large piece or two of cardboard {a little smaller than the tote cover}
-extra brick or something to weight down the cardboard
-fruit and vegetable scraps
Process:
1. Drill several about 1/4 inch holes in the bottom of both totes.
2. Drill small air holes around the top edge of that tote like in the picture here...
 |
| This will be the "top" tote. |
So you should have holes in everything except one of the covers. {The cover without holes works great as a base underneath the stacked totes to catch any material that may come out of the bottom air holes; I only used the cover under the bin when I brought it in for the winter; when it was outside I just put it on blocks near the garden.}
4. Place the bricks into the bottom of the bottom tote (the one that does not have the holes around the top); one in each corner {this will allow air-flow into the bottom of the "top" tote where the worms are doing their work}.
5. Then, stack the tote with the holes around the top into the bottom tote directly on the bricks.
6. Wet the shredded paper. {I put the paper in a large flower pot so that the extra water could drain out the bottom; you want it damp not drowning! If you use a container that doesn't drain, just squeeze the access moisture out of the paper before putting it in the bin.}
Wet paper, draining...
5. Place the damped paper in the "top" tote (the one with the holes around the top edge).
6. Add a scoop of soil/dirt from outside. Toss the dirt with the paper to distribute.
7. Open your worms! This is what mine looked like when I got them. {a couple were escaping and I really wonder what the UPS guy was thinking!?}
 |
| They were packed in cotton batting. |
 |
| In the batting was a cotton bag. |
 |
| Tied with a string. |
 |
| The worms were happily mingling inside. |
8. Add some plant scraps, top with the large sheet of cardboard, then place the extra brick on top.
Top the tote with the cover with the hole and let the worms do their thing!
All you need to do is give the mixture a little stir when you add new fruit or vegetable matter; the worms do the rest!
Enjoy! I was really surprised at how quickly the worms digested some of the material; and its really cool to see super tiny worms appearing in the tote...happy worms=healthy compost!


No comments:
Post a Comment
I love hearing what you have to say; let me know what you think. I look forward to comments and will reply to your comments or questions! Thanks for checking out my blog; come back to visit soon!