This is surprisingly simple to make, there is very little sewing involved.
You could use an old sheet or even one of those canvas paint drop cloths. Or different colored scraps you have!
You can make this any size you want; I wanted mine to be just under the edge of tree, so the kids don't wipe out when running past the tree! :D
Be creative, if you don't try it you won't know how easy it really is!
This only took me about 1 hour (if that) to make! Enjoy!
I have seen tutorials similar to this where people have used a hot glue gun instead of sewing. I wanted to be able to wash this at some point if needed so I chose to sew on the ruffles.
Materials:
-44 x 44 inch square natural cotton fabric {you can use any color or texture you want}
-about 1 1/2 yards x 44 inches across of the same fabric {I used about 56 inches}
-fabric marker {I used a water soluble marker}
-string for making circle, about 3 feet long
-pinking shears, optional {but recommended because then you don't have to finish the edges!}
-thread
-sewing machine
-sewing pins, optional
 |
The pinking shears helps
so you don't have to sew/hem the edges. |
Process:
1. Fold the square of fabric in half, then in half again to make a smaller square; then fold that square diagonally, so that all of the cut edges are all on the same side of the triangle that forms.
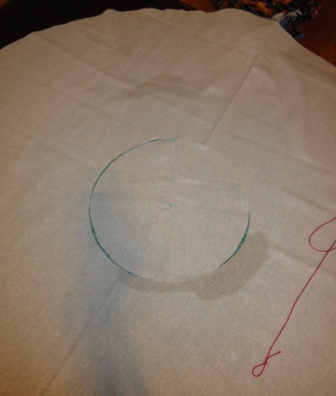
2. Decide how big you want the center circle {mine is going to be 12 inches; I wanted the skirt to fit around the opening of the tree stand, so I could still easily water the tree}.
3. Tie a small loop in one end of the string, like this...
3. Use half of that measurement {so in my case 6 inches} and measure from the folded point and make a mark
4. Using the string with the loop, draw a curved line there at that mark.
 |
I know this is hard to see, but you hold the pen at the measured mark,
hold the other end of the string taut on the point of the triangle
{so you create a sort of compass};
move the pen, keeping the other end on the corner. |
5. Also draw a line as far away from the corner point as you can, like the picture below.
 |
| Ignore the second line away from the corner. |
6. Unfold the diagonal fold and continue those two lines. Also, make a dot at the very point of the fold.
7. Using the pinking shears cut out the center {the folded point} and the outside edge of the skirt.
8. Unfold the skirt; it should look like this...
At this point, I wet the leftover marker spots to remove them.
9. Use the pinking shears to cut the remaining 1 1/2 yards into 8 strips, about 7 inches wide each {just eyeball it, they don't need to be perfect}.
 |
You can see one of the
7 x 44 inch strips unfolded here. |
10. Set the center circle in the center of the skirt.
11. Using the dot in the center of the circle, use the same technique from above to draw a circle {I did mine 7 inches from the outside edge of the skirt}. This line will be a guide for attaching the outside row of ruffles.
12. Make another line the same way {I did this line about 6 inches in from the other line, so 13 inches from the outside edge}.
13. Now, use the pinking shears to cut a line/opening from the outside edge to the center circle.
14. To add the ruffles line up the edge of one of the 7 inch strips with opening edge you just cut.
15. Now, begin sewing about 1/4-1/2 inch from the top edge of the ruffle, back stitch.
16. About every 1 1/2 inches fold the ruffle strip to make the "pleat" of the ruffle; like this...
17. Continue sewing like this until you get to about 2 inches before end of that strip of ruffle.
18. To begin a new strip...
Fold under the end of the strip you are finishing.
Then, lift up the fold and place the beginning of the new strip underneath the folded piece.
19. Continue sewing until you reach the other side of the opening {I used about 4 1/2 of the strips}.
20. Next, do the same thing with the remaining strips on the smaller circle you drew.
21. I ended up with a strip 22 inches long and 7 inches wide left; this will be used for the ties. Cut (with the pinking shears) them in half lengthwise.
22. Now, using the pinking shears cut the strips in half lengthwise again.
23. Line up the unfinished edges of the ties at the top near the center circle and at the top of the bottom ruffle.
24. Pin the ties in place.
25. Sew the ties to the skirt; fold them over and top stitch {I know stitching doesn't look great, but no one will notice it!}
26. Tada, your done! Tie around your tree and enjoy!


No comments:
Post a Comment
I love hearing what you have to say; let me know what you think. I look forward to comments and will reply to your comments or questions! Thanks for checking out my blog; come back to visit soon!