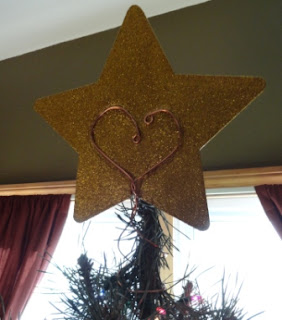
This was a pretty simple once I figured out what I was going to do. And very cheap to make!
Materials:
-large felt star {the store I went to had yellow, blue and green}
-acrylic paint. for base color {I used a copper colored metallic}
-gold or other color glitter paint {I used two different ones, one with regular sized glitter and one with finer glitter in it}
-about 3-4 feet of strong copper wire or wire coat hanger {I striped some copper electrical wire}
-hot glue gun and extra glue sticks
-large paper or newspaper for protecting your work surface
Process:
1. Paint the felt star with a base color {I actually used two different copper colors}.
 |
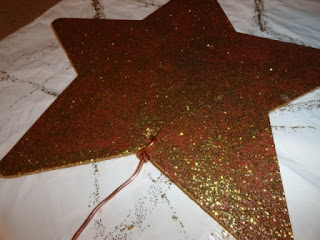
| I punched a hole in the bottom of the star; I originally thought this would be where I would attach the star to the top of the tree; but that wouldn't work (so please ignore the hole and wire). |
The first coat of paint takes a lot because the felt really "sucks" it up; don't worry the next coat of paint will go on easier.

2. Paint both sides of the star; moving around the star to prevent it from sticking to the paper (Tip: You could paint both sides and place the star on a piece of wax paper to dry; it won't stick to the wax paper once dry)
 |
| The wire "mistake" came in handy for hanging the star to dry. |
5. Paint glitter paint all over the star; I just squirt the paint directly onto the star; there's really no need to dirty a paint tray for this project.
Make sure you get all of the edges too.
The glitter paint is kind of like glue with glitter in it, the milky-white will disappear as it dries.
6. This is what mine looked like after the first coat of "chunky" glitter paint was dry.
7. Now paint on more glitter paint; I did 2 coats of chunky glitter paint and 3 coats of the finer (extreme) glitter paint.
(Note: It looks like there is more glitter when you see the star in person.)
8. Now you can glue on any wire shape you like; I did a heart on both sides; this side isn't as nice as the other side... so it will be the back!
I just did a bead of hot glue all the way around the outside of the heart shape; that was enough to hold it in place.
9. For the actual part that holds the star on the top of the tree; bend your wire half (like a "U"), the bottom of the "U" should be the part that goes down around the very tip-top of the tree.
Loop it around almost so that you get two spirals going in opposite directions (you could do this around a round bottle if that helps).
Twist the two sides of the wire around each other and then form a shape of your choice.
10. Next, make sure that the heart (or whatever shape you make) is flat and will lay flat on your painted star. (You can do this by pressing the heart on a table top.)
11. Now you are ready to glue the heart/stand onto the star.
Just apply the glue around the outside of the heart. (Tip: hold the wire down with the eraser end of a pencil while it cools; then you won't burn your fingers! Just don't glue the eraser to the wire. :D)
12. At this point I decided to add more of the "extreme" glitter to the cooled glue, that way it blends into the star more.
You can see here, paint up to the wire, but not on the wire (unless you want the wire to be glittered too).
13. I painted more glitter on both sides.
14. Once the stand part of the star is attached you can use it as a stand for drying too; I just put mine over a large acrylic glue bottle. (This also lets you see how it will stand on the top of your tree.)
15. Once you are satisfied with your star its ready to go to the top of the tree! (I thought I wanted to add more, but once I saw it on the tree, I thought it was great as is!)
You can see the way the spiral of the wire fits right around the tip-top of the tree.
 |
| I know it looks like its leaning, but its not so it must be the angle of the camera. |


No comments:
Post a Comment
I love hearing what you have to say; let me know what you think. I look forward to comments and will reply to your comments or questions! Thanks for checking out my blog; come back to visit soon!