Pages

Thursday, June 27, 2013

Double Crusted Rhubarb Triple Berry Crisp

This is a super, duper tasty crisp recipe!  

I couldn't tell you where I found this one, but one thing I really like about it is the double crust.

I used my Homemade Rhubarb Triple Berry Pie Filling; you could probably use any pie filling or go by the original recipe for Cherry Rhubarb Crisp {listed below, which I will be trying in the near future}.

Ingredients for Crust:
-1 cup quick cooking oatmeal {I actually used old fashioned oatmeal, that's what I always have}
-1 cup brown sugar, packed
-1 cup flour {wheat or other flour would work fine too}
-1/2 cup butter, melted
-pinch of salt

Ingredients for Original Recipe's Filling:  {I used my Homemade Rhubarb Triple Berry Pie Filling}
-4 cups rhubarb, diced
-1 cup sugar
-1 cup water
-2 tbsp cornstarch
-1 tsp almond or vanilla extract
-1 can cherry pie filling
-1/2 cup walnuts or pecans, chopped, optional

Process:
1. Preheat oven to 350 degrees.
2. In a mixing bowl, combine oats, brown sugar, flour, butter and salt.  Mix well.
3. Press half of the mixture into the bottom of a large pie dish or any dish larger up to a 9 x 13 inch pan {the pie dish will give you a thick crust and the 9 x 13 inch pan will give you a thinner crust}.
4. For my Rhubarb Triple Berry Filling I just had to pour in the already prepared pie filling.
*Process for original recipe's filling: 
a. Spread the rhubarb over the bottom crust.
b. Combine sugar, water and cornstarch in a saucepan; boil until thickened.
c. Stir in almond or vanilla extract and cherry pie filling.
d. Spoon mixture over rhubarb.

5. Sprinkle the remaining crust mixture over the top of the pie filling.  Next, sprinkle with nuts if using.
6. Place crisp on a foil lined baking sheet, in case of a boil over.  {I was surprised mine didn't end up boiling over, but if I didn't do this I'm sure it would have been all over the bottom of my oven!}
7. Bake crisp for 45 minutes to 1 hour, until golden.
8. Remove from oven and allow to cool slightly before serving.
This crisp would be great with fresh whipped cream {or Cool Whip} or vanilla ice cream.  But its also very good on its own!  Enjoy!

Monday, June 24, 2013

Old Fashioned Meatloaf

This is a really great meatloaf; even to rival my mom's meatloaf which is fantastic!  Okay, they have a lot of the same ingredients so maybe that's why!?!  But the one thing that is different about this one is it has garlic powder and coriander in it.  

You could make make this meatloaf the day before and bake it the next day; you may need to bake it a little longer, probably about 15 to 20 minutes longer so the internal temperature reaches 160 degrees.

This is yet another recipe someone shared on facebook and I don't know who?; so sorry I don't have a source for you, but if you know who's recipe this is please share!  

The last time I made this I doubled the recipe and made it in an 8 x 11 inch baking dish.  Enjoy!

Ingredients:
-1 lb. ground beef
-1/2 cup oatmeal {you could also use cracker crumbs or bread crumbs}
-1 egg
-1/2 cup milk {you could also use evaporated milk or half and half}
-1 tsp salt
-1/2 tsp black pepper
-1/2 tsp garlic powder
-1/2 tsp ground coriander
-1/4 cup chopped bell pepper, optional {I don't use, because of the kids}

Topping:
-1 cup water
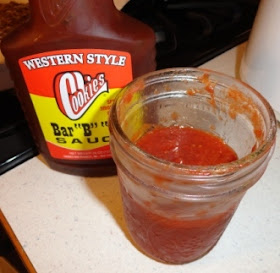
-1/2 cup ketchup {and/or barbecue sauce; I use about half ketchup and half barbecue sauce}

Process:
1. Preheat oven to 350 degrees.  Spray a 9 or 10 inch baking dish with non-stick cooking spray.
2. In a medium bowl, combine all meatloaf ingredients.
I know my ground beef looks pale;
I thawed in in some water
and there was a hole in the meat bag.
3. Mix meatloaf ingredients well; I usually just use my clean hands, but you could use a spoon.
4. Evenly pat the meatloaf mixture into the prepared dish.
5. Bake for 1 hour until internal temperature reaches 160 degrees.
6. Remove meatloaf from oven.
7. Mix together the ketchup and/or barbecue sauce and water in a small bowl.
I used about 1/4 cup homemade
ketchup and 1/4 cup barbecue sauce.
8. Spread sauce evenly over meatloaf.
9. Return meatloaf to oven for another 15 minutes.
10. Remove from oven; let rest 5-10 minutes and serve.  Enjoy!

Thursday, June 20, 2013

Spanish-Style Pork Steak Wraps

These were really great!  I found the original recipe from FoodNetwork.com.  

It was easy to prep; you just mix the marinade with the meat and allow it to sit for 24 to 48 hours and you're good to go!

I especially liked the sour cream sauce!  It is a great combo of cilantro {you could use parsley if you don't like cilantro}, lime/lemon and sour cream!
Ingredients for Steak:
-1 to 2 tbsp fennel seed {I only had about 1 tbsp, so I used what I had}
-2 tbsp black pepper
-1 tbsp smoked paprika {or 1 tbsp sweet paprika plus 1 tsp liquid smoke}
-1 tbsp salt
-3 to 5 pounds bone-in pork steak
-2 tsp ground garlic
-1/2 cup red wine vinegar
-3 tbsp olive oil

Ingredients for Sauce:
-1/2 cup fresh cilantro, chopped
-juice of 1 lime or lemon
-1 cup sour cream

Extras:
-corn or flour tortillas
-lettuce, optional
-chopped or sliced tomato, optional
-thin sliced cucumber, optional
Process:
1. Toast fennel seed in a small pan over medium-low heat, until fragrant.
2. Place toasted fennel seed in a coffee/spice grinder or crush with a mortar and pestal.
3. In a large air-tight container combine toasted ground fennel seeds, pepper, paprika {liquid smoke}, salt, garlic powder, red wine vinegar and olive oil.  Whisk well to combine.
4. Coat steaks in marinade and refrigerate for 24 to 48 hours, shake occasionally to coat steaks.
5. For the sauce, mix together sour cream, lime/lemon juice and cilantro.
6. Combine well and pour into a air-tight container until serving time.
7. Grill steaks or place them on a broiling pan and broil until cooked through.  Flip to brown both sides.
8. Remove steaks from oven and allow to rest for about 10 minutes.
9. Then, de-bone the steaks and slice into thin strips.
10. Serve steak with corn or flour tortillas and the prepared sour cream sauce.

Monday, June 17, 2013

Map Silhouette!

I came across this on Re-Scape.com's facebook page; and thought it could be a really cool project to do with kids or adults!  It would be neat to have the whole family on a wall like this!


Friday, June 14, 2013

Lemon Zucchini Poppy Seed Bread

This is some really tasty bread, and its also very easy to make!  I found the recipe from Taste of Home.  
Yes, those are Big Mr. J's fingers
trying to snatch a piece of
bread WHILE I am taking pictures!
The great thing about this recipe is that it makes 2 loaves; so you can freeze one to use later or if you are like my family, you can have another loaf waiting after one gets finished!
Ingredients:
-4 cups flour
-1 1/2 cups sugar
-1 pkg. (3.4 ounces, I think my box was 3.something else) instant lemon pudding mix
-1 1/2 tsp baking soda
-1 tsp baking powder
-1 tsp salt
-4 eggs
-1 1/4 cup milk
-1 cup canola oil {I'm sure you could substitute apple sauce if you wanted}
-3 tbsp lemon juice
-1 tsp lemon extract
-2 cups shredded zucchini, squeezed dry {I used my frozen zucchini (looked like at least 4 cups before thawing) from last fall; I just thawed it in a colander and squeezed it dry; I think I prefer it to fresh for this recipe}
-1/4 cup poppy seeds
-2 tsp grated lemon peel, optional
Process:
1. Preheat oven to 350 degrees and lightly grease 2 loaf pans.
2. In a large mixing bowl combine eggs, milk, oil, lemon juice and lemon extract.  Beat to mix slightly.
3. Add baking powder, baking soda, salt, poppy seeds and zucchini (and lemon peel, if using).  Mix.
4. Add in flour and sugar.  Mix well.
5. Pour bread batter evenly between the two loaf pans.
6. Bake for 55-60 minutes.
7. Cool loaves in pans for 10 minutes, then remove to a wire rack to cool completely.
8. Enjoy on its own or with butter or honey!