
These are really fun to make! And I think you'll find them a lot easier than they seem.

This is really fun to do with kids; they love to create something that will be permanent in their outdoor living space.

Start collecting your cardboard boxes now so you have a variety of shapes and sizes when Spring comes! Enjoy!

Materials:
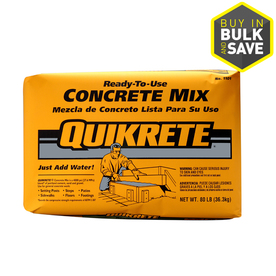
-concrete mix, like Quikrete {I think I used 3 or 4 bags to make 16 stepping stones; it will depend on the size of your boxes}
-water
-shovel for mixing
-assorted boxes, your stepping stones will be the size and shape of the bottom of the box {I like lots of different sizes and shapes, but keep in mind the larger the bottom of the box, the heavier the stepping stone will be.}
-rubber gloves, optional
-large container for mixing {I used a wheelbarrow}
-assortment of polished pebbles, large beads, glass pebbles, small glass tiles, etc. {glass is nice because the sunlight shines though it}

Process: {Sorry, I didn't take time to take pictures as I went.}
1. Mix one bag of Quikrete with enough water to make it into a thick oatmeal consistency; use the shovel to mix, thoroughly. {Don't mix in too much water or they'll take longer to set and won't be as durable when finished.}
2. Either fold the flaps of your boxes in or cut them off so they don't get in your way.
3. Pour/shovel concrete mix into boxes until the concrete is about 2 inches deep in the box.
4. Shovel into boxes until all of the mix is used.
5. Shake or kick the sides of the boxes to level the concrete mix and remove any large bubbles of air.
6. Immediately press glass pebbles, polished stones etc. into the surface of the concrete {press them in, but be careful not to bury them}.

Tip: You can create designs, images and/or words!
-make a set of stones to be displayed in your yard or garden that go together
-maybe put a different letter on each stone, arrange them to make a word/name
-make an image of someone/something you love; clouds, trees, family pet!
-create cool designs you love!

7. Allow the stepping stones to set at least 5 hours or overnight.
8. Carefully rip the boxes away from the set concrete stepping stones. {Don't worry about the cardboard on the bottom of the stepping stone, the cardboard will decompose into the soil around it.}

Tip: If you are having trouble ripping the boxes off you can wet the stepping stones with water and let the water soften the cardboard; then they will be easier to rip away, although this will create more of a mess.

9. Arrange the stepping stones around your yard or garden and enjoy!


I love this idea, so much better than those tiny plastic molds you have to do a jillion of. Thanks for sharing!
ReplyDeleteI agree the little molds just aren't practical. Enjoy!
ReplyDeleteThese are so cool! My sister, daughter, grandaughter and I just made these today and we had such a wonderful time making them. My sister and I used some of our Mom's old costume jewelry and some coins our Dad flattened on the railrod tracks and other mementos from our parents. They are both gone now and we are so happy to have this reminder of them whenever we are outside on our patio.
ReplyDeleteDo you line the bottom of the box with anything to keep it from seeping through if the box has small openings?
ReplyDeleteNo, I don't. I've never had a problem, concrete is usually thick enough to not seep through holes. Good question!
ReplyDelete