Thursday, August 8, 2013

Cheesy Chimichangas

These are very good and you can make them the day before or the morning of if you like.  I found the recipe in one of my Brand Name Recipes cookbooks.

Ingredients:
-1 to 1 1/2 lbs. ground beef or other ground meat
-2 large onions, chopped
-2 tsp garlic salt
-1/2 tsp black pepper
-5 to 8 flour tortillas
-2 tbsp vegetable or canola oil
-16 ounces salsa {I used 3 chopped tomatoes}
-4 cups cheddar or other cheese, shredded

Optional Ingredients for Serving:
-shredded lettuce
-chopped tomatoes
-chopped onions
-sliced jalapeno peppers
-sour cream
-black olives
-guacamole
-salsa

Process:
1. Preheat oven to 450 degrees.  Grease a 9 x 13 inch baking dish and set aside.
2. Cook beef until browned and drain off excess grease.  Let set.
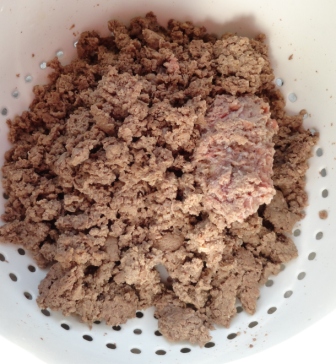
3. Cook onions in the same pan, until cooked through and browned if you like.
4. Return meat to pan, heat through. 
5. Add salsa or chopped tomatoes to meat mixture.
I pureed the tomatoes to make
them less detectable to the kids.
6. Mix thoroughly.
7. Lay a tortilla on your work surface, spray or brush it with oil on the inside side {this helps prevent the tortilla from getting soggy}.
8. Top tortilla with a row of shredded cheese.
9. Add a generous scoop of the meat mixture.
10. Roll up tortilla:
...first fold in sides.
 ...then roll up from the bottom.
11. Place tortilla in prepared baking dish seam down.  Repeat with remaining tortillas and fillings.
12. Spray or drizzle with oil {this makes the exterior crunchy}.
13. Top with the remaining cheese.  And bake, uncovered, for about 25-30 minutes.  {Longer if you made these ahead of time and refrigerated them; probably about 45 minutes.}
14. Serve with the toppings of your choice.  Enjoy!

Print Friendly and PDF

Monday, August 5, 2013

Happy Monday!

We'll so far today I have canned 3 quarts and 7 pints of dill pickle spears.  

Its a bummer I wasn't able to find even one cucumber plant in any store this spring, so I had to buy them at the Farmer's Market this past weekend.  Oh well, at least I'm supporting other local farmers, right!

Then, I went out to collect grass clippings which I use to mulch my garden.

Also, collected some old tires from our woods which I am going to make into planters.  {We don't put tires in our woods, they were left there by the previous owners.}

Now, I'm off to harvest some chamomile flowers to dry for tea with the kids!  Only 16 days till my son goes back to school already!  Its gone way too fast!

Hope you are all enjoying your summer and having a marvelous Monday!

Print Friendly and PDF

Saturday, August 3, 2013

Double Chocolate Banana Bread

Double Chocolate Banana Bread!  Ooo, the kids love this one!

I found this recipe in my Cooking Club magazine a while ago and have made it several times for the kids.  Its great!

Ingredients:
-1 cup sugar
-2 eggs
-1/3 cup vegetable oil {I usually use canola, but sometimes I substitute applesauce!}
-3 ripe bananas
-1 tsp vanilla extract
-1 1/2 cups flour
-1/2 cup cocoa powder
-1 tsp baking powder
-1 cup semisweet chocolate chips {you could use milk chocolate chips too, but I always buy the semisweet}

Process:
1. Preheat oven to 350 degrees.  Spray a loaf pan with non-stick cooking spray.
2. Beat together sugar, eggs, oil, vanilla and bananas broken into pieces.
3. Add flour, cocoa powder and baking soda.  Mix well.
4. Scrap sides of bowl and add chocolate chips.  Stir well.
5. Pour batter into prepared loaf pan.
6. Bake for 60 to 70 minutes or until a toothpick inserted into the center comes out clean.
7. Cool for 10 minutes in the pan.
8. Remove from pan onto a wire rack to cool completely.
Enjoy! Print Friendly and PDF

Wednesday, July 31, 2013

Re-purposed Chicken Waterer

We had two of these metal waterers just sitting in our barn, not being used for anything.  So, I came up with this idea.  
And truly I love it!  I have only had to water these flowers once since I planted them and its been almost a month; these waterers are great because they hold moisture for the plants and when it rains the bottom "tray" holds extra water for the plants to "suck" in.
Materials Needed:
-metal watering can
-double loop chain {about twice as long as you want your plant to hang}
-wire cutter
-pliers
-drill with drill bit {just a little larger than the diameter of your chain}
-soil
-plant of choice {you could do flowers, herbs, lettuces, etc.}
Process:
1.  Drill one hole through the waterer on each side; I recommend that you do this on either side of the top handle for added strength.
You can just barely see the hole I drilled
about 1 inch below where the handle is attached.
2. Use the wire cutter to cut the end link on both ends of the chain, then use the pliers to bend the links out enough so they will be able to loop into the holes you drilled.  Loop both end links into either side of the waterer.
3. Add soil and plant to waterer; you don't need any  drainage material or extra holes since these waterers already have a hole to let out water.
I recommend not watering your freshly planted plants until they are already hanging where you want them, so they aren't too heavy for you to hold up to hang.
4. Unloop one side of the chain from the waterer, hold the plant up to the branch where you want it to hang and loop the chain over the branch, then place the open chain link back into the hole.
Adjust the waterer so that it hangs level, water plant and enjoy!
I also think since I hung my flowers from trees the little bit of shade that they get throughout the day may help them to retain water too.
You could also hang these from a hook on a porch, deck, post, etc.
 Enjoy!

Print Friendly and PDF
Related Posts Plugin for WordPress, Blogger...