Wednesday, August 28, 2013

Homemade Apple Cider Vinegar

I came by this idea of making your own apple cider vinegar this past spring.  I tried it in a quart jar and loved it!  

I actually ended up drinking most of it mixed in one of my many daily glasses of water {about 1 tbsp per day}.  If you are going to drink apple cider vinegar for the benefits or just because you like it; you should be drinking Apple Cider Vinegar with the Mother.  

The homemade vinegar is overall much more enjoyable and not quite as "shocking" as drinking even the store bought ACV {apple cider vinegar} with the mother.  I found it much milder and it was almost like putting lemon in your water.  

There are a ton of uses for ACV, see 10 Amazing Facts About Apple Cider Vinegar which tells you how to use it on your hair, your skin, as a wart remover, as a sun burn remedy, etc.

Plus, making your own ACV is fun {at least for me, I get a kick out of things like this} because you get to use all of the left over pieces of apple; like the cores and the peelings the kids decide they don't like to eat.  

An additional benefit to this is that if you have chickens, you can feed them the apple pieces once you've completed the process and they are good for them too!  Otherwise you can also add the apple pieces to your compost pile.

I have a gallon of this stuff brewing right now that I started last week!  Looking forward to using it!

Ingredients for 1 Quart:
-peels and cores from 6-8 apples
-2 tbsp honey
-water

Process:
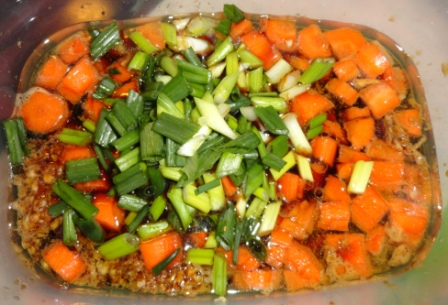
1. Place all of the apple peels and cores into a glass or plastic container.
2. Cover the apple pieces with water and top with the honey.  Stir as best you can {I actually put a lid on the jar and shook it to mix it well}.
3. Place a paper towel on top of the jar and secure it with a canning band or a rubber band.
4. Let the mixture sit for 2 weeks {I think my first batch actually sat for about 3 or 4 weeks}.  I just put my jar on a shelf in a closet near my kitchen, where it wouldn't get messed with or tipped over.
5. Strain out the apple pieces.
6. Return the liquid to the jar and cover it again with a paper towel and a band.
7. Leave it for 4 more weeks {the original recipe, which I don't know where I found it says to stir it daily, but I didn't}.

Taste it to see if it is the acidity you like.  If it does, transfer it to a covered bottle or container for storage.  If not, leave it in the jar covered with the paper towel and band a little longer, checking every few days until you like the taste.

Enjoy!

Print Friendly and PDF

Tuesday, August 27, 2013

Liquid Chai Concentrate

This is a great recipe for Chai Concentrate; it keeps for up to 6 months in the refrigerator; if it lasts that long for you.

This recipe makes about 1 1/2 cups, which is enough for about 28 cups of chai.

I found this recipe on OregonLive.com, published on December 1st, 2009; although I could not find the recipe when I went back to find it {I had printed it, thank goodness!}.

I have been using it in my coffee in the morning; although I keep forgetting to try it in my tea during the day.

Ingredients:
-14 ounce can sweetened condensed milk
-1 tsp sugar
-1 tsp ground cardamom
-1/2 tsp ground cinnamon
-1/2 tsp ground cloves
-1/2 tsp ground nutmeg
Process:
Mix all ingredients in an air-tight container.  Store in refrigerator.
To use with tea:
Brew a cup of strong black tea, add two heaping teaspoons of chai concentrate.  Stir until combined.

For chai coffee:
Add 1-2 teaspoons to a hot cup of coffee, stir to combine.

Enjoy!


Print Friendly and PDF

Monday, August 26, 2013

North African Grilled Chicken

This is a fantastic one!  The first night I made this we had someone that works with my husband over and he said that it was definitely the best chicken he has ever had!  That's when you know its a keeper!

I have made this a couple of times now and the last time I did, I cooked it in the oven; it was still great, but grilling just adds that extra dimension of flavor!

I adapted this recipe from Epicurious.  Enjoy!
Ingredients:
- 1/2 tsp crushed red pepper flakes
-2 tbsp coriander seeds
-1 tbsp ground cumin
-1 1/2 tsp dill seed
-1 1/2 tsp fennel seed
-2 tbsp minced garlic {about 4-5 cloves}
-1 tbsp black peppercorns {you could use 1 tbsp ground black pepper}
-2 tsp salt
-5 tbsp olive oil
-4 to 6 chicken breasts with skin and bone  {or 3-4 lbs. other chicken on bone}
Process:
1. Use spice/coffee grinder or mortar & pestle to grind together all spices... pepper flakes, coriander seeds, cumin, dill seed, fennel seed and peppercorns.  {You could place them all in a zip-lock bag and crush with a rolling pin.}
2. In a small mixing bowl combine ground spices with salt, garlic and olive oil, mix well to combine.
3. Place chicken in an air-tight container.
4. Pour spice paste over chicken.
5. Rub spice paste all over chicken.
6. Cover and place chicken in refrigerator for at least 4 hours or up to 3 days to marinate.
7. Grill chicken over medium heat until the internal temperature has reached 165 degrees.
My husband thought it it was "burnt", but truly I thought it was perfect.  The chicken was moist and very flavorful!  Enjoy!
Print Friendly and PDF

Wednesday, August 21, 2013

Game Cam!

We set up a game cam to catch images of what is coming and when they're coming to eat the chickens food at night. 

You can see what we usually get on the game cam on theArtisticFarmer's facebook album.  

This is what we got last night...
Something had come, killed and eaten the head off of one of our guineas and left it behind by a tree in our squash garden.  This owl cam and took the entire guinea last night!
This is probably the bird we have been hearing every night screeching all night!

Print Friendly and PDF

Tuesday, August 20, 2013

First Egg of 2013!

This morning we got our first egg for the year!  Our chickens are now about 4 1/2 months old. 

When I went to let the birds out this morning, only Taco, one of our roosters was interested in coming out for a bite and then he went right back in to roost.
Feathers, one of our little bantam beauties more directly from the roost to a nesting box!  The other eggs in the nesting boxes are guinea eggs that I placed in there to help the girls know where to lay their eggs.
Everyone just stayed in the coop, watching Feathers in the nesting box.  I left and gave them some privacy.
Then when I came back to check on them, about 8:00 Feathers had laid this in the corner nesting box! 
Now that the egg was laid; it was time for everyone to head out and get a morning bite to eat an begin their daily activities!
* I have ordered more female chicks {since out of the 17 birds we got from my nephew's class hatching, only 5 were hens!} that are to be arriving some time the week of September 16th! I was going to wait till spring, but then the minimum order is 25 chicks.  By ordering now the minimum was 15 chicks; we don't need 25 more!  

So, Big Mr. J will get his Turken; actually I ordered him two turken chicks!  We're excited!

Print Friendly and PDF

Tuesday, August 13, 2013

Crockpot Mongolian Beef

This was a really good and very easy way to go about making Mongolian Beef, which my family loves!  Just start it in the morning and all you have to do in the evening for supper is make the rice; and rice is easy and minute rice is way fast!

I found the recipe from Six Sister's Stuff.  I made the addition of some diced green bell pepper because I had some in the fridge and it sounded like a great addition; it was!

Ingredients:
-1 1/2 lbs. beef flank steak, trimmed of excess fat and cut into stir-fry strips {really you could use any steak you have, flank steak is just the suggestion; cooking low and slow will always result in nice tender pieces of meat.}
-1/4 cup cornstarch
-2 tbsp olive oil
-1/2 tsp minced ginger
-2 cloves garlic, minced
-3/4 cup soy sauce
-3/4 cup water
-3/4 cup brown sugar
-1/2 cup shredded or sliced carrots
-3 green onions, sliced thin
-1 green bell pepper, chopped {optional}

Process:
{To prep in advance: Combine vegetables with olive oil, ginger, garlic, soy sauce and water and place in refrigerator to marinade until ready to use.  Also, make sure you have your meat trimmed and sliced to speed up the make in advance process.}
1. Spray crock-pot with non-stick cooking spray.
2. Place cornstarch in a bowl. Coat each piece of steak with cornstarch and place in crock-pot.  {You may need more cornstarch, depending on how well you coat the meat; discard any leftover cornstarch.}
3. Combine remaining sauce and veggie ingredients {if you haven't already}.
4. Pour sauce and veggies over the meat, DO NOT STIR.
5. Cook on high for 2-3 hours; OR I recommend on low for 4-5 hours, for more tender meat {if you start this before work, don't worry, just leave it on low all day and it will be fine; totally ready for supper when you get home!}
This is what mine looked like after a full day of cooking on low.
6. Stir just before serving.  
Best served over rice, you can also add some extra sliced green onions for a burst of freshness.  Enjoy!

Print Friendly and PDF

Monday, August 12, 2013

Crockpot Salisbury Steak

This is a really awesome recipe; you can prep it up to two days in advance and just refrigerate until 5-6 hours before meal time.  Its very hardy and a great "comfort" food at the end of a long day!

I usually serve these with a salad or another veggie and mashed potatoes or plain rice since the sauce is great with both!

I adapted this recipe from AllRecipes.
Ingredients:
-2 lbs. ground beef or other meat
-1 (1 oz.) enevolope dry onion soup mix {you can substitute a mix of fresh diced onion or dried minced onion and salt and pepper}
-1/2 cup italian seasoned bread crumbs {or cracker crumbs, oatmeal, or any other bread toasted and crumbled}
-1/4 cup milk
-2 (10.75 ounce) cans condensed cream of chicken or cream of mushroom soup
-1 (1 oz.) packet dry au jus mix  {I usually just add about a tbsp or two of Kitchen Bouquet, found by the gravy mixes in any grocery store}
-3/4 cup water
Process:
1. Mix together the beef, bread crumbs and milk.
2. Form the mixed meat into 8 patties or about golf ball sized meatballs.
3. You can fry these at this point, but I like to cook them in the oven at 350 degrees for about 30-40 minutes.
4. Place cooked patties or meatballs in the bottom of a lightly greased crock-pot dish.
5. In a medium bowl combine condensed soup, au jus mix, onion soup mix and water.  Mix well.
6. Pour over meat.
7. Cook on Low for 4 to 5 hours; don't worry if you put this on before you go to work and work for 8 hours; it won't over cook  {if refrigerated cook on Low for at least 5 to 6 hours}.
8. Serve with what ever sides you like and enjoy!

Print Friendly and PDF
Related Posts Plugin for WordPress, Blogger...